Showing posts with label porcelain. Show all posts

Thursday, May 09, 2013

Gettin' it done.

It's amazing what you can accomplish when you have a deadline and a very specific to do list mapped out so there is no time for distraction.


I got tons of photos taken.  So many that I overheated my camera.


Many of these pieces will be in the show at the Matador this weekend.


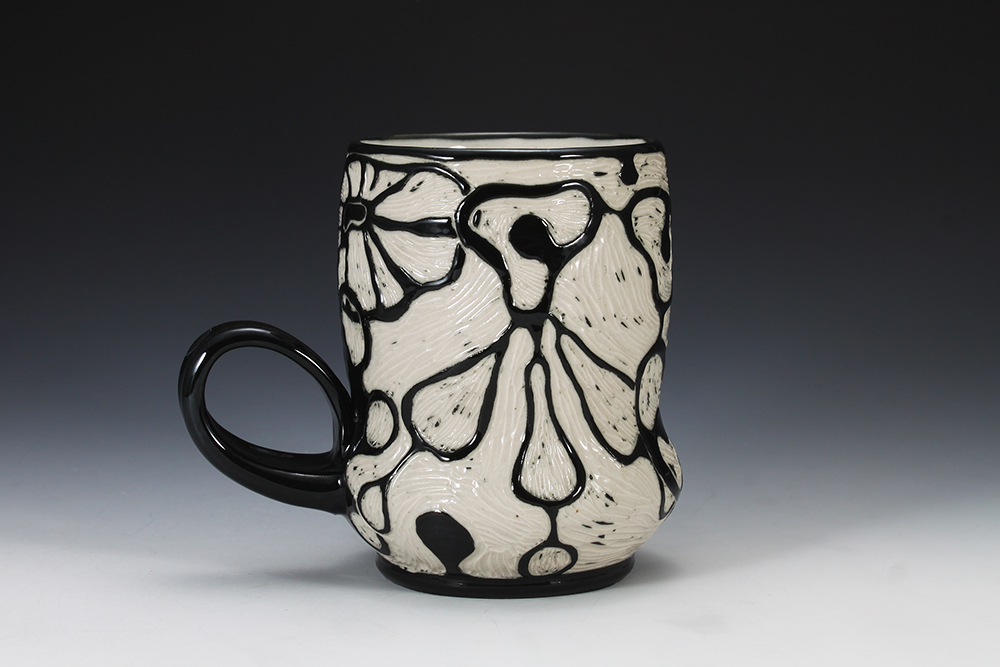
I had a lot of fun making these little cups.


So much delicious contrast on these pitcher.  

We made it over hump day and were on the downward slide to the weekend.  Keep smiling.

Thursday, February 07, 2013

My Micro Ceramics Studio


You really don't need a whole lot of space to make your art or craft.  My ceramic artist friend, Jenny Mendes, has a very small studio.  When I moved into my small duplex last summer I was inspired by Jenny to convert a corner of my tiny kitchen into a micro studio.  The space I am working in is only about 5 by 6 feet, or so.  I haven't actually measured it.  The slab roller just barely fits into the space between the refrigerator and the window.  My pottery wheel slides under the slab roller when not in use which also makes it easier to get out my back door which is right next to the window on the right.  On the wall opposite the wheel I have a shelf to hold work in progress but it is usually covered with tools, supplies, slips and random junk, causing me to occasionally spread out into the leaving room or out on the back porch in good weather.  I try to keep it really clean by mopping and wiping my shoes on a rug so I don't track clay throughout the house.  So far it is working great and I am getting a lot made.  Plus, I think everyone should have a great big refrigerator right next to the work space to post all sorts of inspirational material on.  The close proximity of food does not seem to distract me but I do enjoy sustaining my practice with the frequent consumption of dark chocolate!


Unfortunately, my studio does not have a kiln so I fire my work in a variety of places from friends studios to places like Penland School of Crafts.  I've often thought it would be fun to have a mobile studio on wheels since that's what my car feels like when I am transporting supplies, tools, and work in various stages around town.  But I actually really enjoy this chance to get out and be with other people and not be holed up in my studio like a hermit all the time.  I frequently make work in the studios of my friends which is great for socialization as well as inspiration and feedback.  


This is the most recent batch of work that has been happening in the micro studio the past couple of weeks.  These here are still wet today.  I was up until about 1am happily working away on these and watching movies on Netflix.  These will be going into the first soda firing of the 2013.  I can't wait to see how they turn out.  I am aiming to get the firing going next week or at the latest, the following.  


I just decided to incorporate some sgraffito into these pieces inspired by the tutelage of the fabulous Miss Kathy King when I was at Penland last spring.  I can't believe it has been almost a year already since I was there!  But not to fear, I am going back in May and June for a month to do some more studio assisting and I can't wait.  I am going to get to wood fire!  I will be working with Richard Burkett and Joe Molinaro in the first two week session and then I will be assisting Marc Leuthold in a second two week session for beginning and intermediate wheel throwers.  Both of these classes can be found on the Penland website.  I encourage everyone to take a class a Penland.  It is a blast!  

But wait, that's not all.  I will also be assisting Jenny Mendes in her workshop, Surface Navigation, at Arrowmont School of Arts and Crafts in July.  It is going to be a very, very busy, busy year as I will also be traveling to Houston for the annual ceramics conference, NCECA, and I will be packing and moving across the country to go to grad school.  Wish me luck and lots of energy!


Monday, January 14, 2013

Soda Love


Remember a couple of posts ago when I was working on my paper stencil patterns at my computer table?  Well, here are the beauties!  Yes, it has taken me almost a month to get them photographed.  The firing was right before Christmas!  I think I have an aversion to my somewhat bulky photo shoot set up.   
Time to tackle that problem and make a mini version that doesn't take over my tiny living room.


But all that aside, I am really excited with the progress I am making with these.  It was a crazy long firing because the kiln door bricks and furniture got wet in a wild downpour so we had to "dry" out the kiln first.  It went for sixteen or eighteen hours or so when it should have only been about 12.  We did finally get the kiln firing much more evenly but I messed with the flew damper enough to knock a bunch of junk down into some of my pieces.  I've ground out a bunch of it and will try touching up the glaze and re-firing them in another cone 10 firing, or even cone 6 electric to see how that might work.


I'm busy making more work so that hopefully I can get another soda firing going by the first of February. Keeping my fingers crossed about that one.  I'm not exactly sure if I'll have access to the same kiln but if that doesn't work out I can always take some work out to Penland!  Yep, I'm headed out there again in May for a month to do some more studio assisting.  I can't wait!  And I am also going out to Arrowmont for my very first time!

Side A
Here is another one of my favorite pieces that I made last fall.  I stuck this in with my besties and started using it right away.  Somehow I just forgot that I wanted to document it.

Side B
I actually made two of these and the other one was fabulous also, that is until I sacrificed it to the soda kiln.  I was so positive it would come out great but I was not at all happy with it.  The underglaze fumed and bled and the clay body went very grey.  It's interesting and I'm sure someone would like it but me?  Not so much.  I'm glad I took this photo.  Something about seeing them in the right light on a nice backdrop has freshened my determination to make a few more.  


Monday, October 01, 2012

Paper Clay Adventures


Right now I feel like I am participating in a mini, self-imposed, paper clay residency.  I got really fascinated by this when Rebecca Hutchinson taught at CSU Summer Arts in July.  Rebecca encouraged me to try this technique of stenciling, painting, and silk screening on a slab of plaster and then pouring a layer of paper clay slip on top.  I was so wrapped up in my installation project that I never got around to trying this out.  So now I am making up and giving it a whirl.


I want to expose a screen next but first I thought I would start off with a hand cut stencil.  I actually forgot about drawing directly on the plaster so I probably would have started with that.  Here I am using a thick porcelain slip made from my throwing leftovers to which I have added toilet paper.  I took a small amount of it and tinted it with turquoise stain.  


I had to let go of my ocd, perfectionistic tendencies with this whole process.  The stencil is not precise and the slip kind of likes to spread under the stencil a bit.


The crazy part is when you pick up the bucket of paper clay slip and pour a thick layer over the whole slab, obscuring the image in the process.  By the way, don't stop pouring and run to get your camera as the leading edge of the slip will start to dry out and will leave a line of demarcation after you pour the rest of the slip.  This line will have a tendency to want to crack later when you are manipulating the slab.  Good to know, just pour it all at once and spread it quickly and thick.


After a few hours, depending on weather (it was a hundred degrees when I did this), a half inch thick pour of slip will have turned into a quarter inch thick sheet that can be peeled pack from the plaster.  I was so excited to see that it actually worked and didn't tear.


I had some extra so I used a commercial stencil on this smaller plaster slab.


This close up shows the paper fibers pretty well.


So, I learned that it is good to plan what you are going to do with your sheet of clay before you make it so you aren't running around scratching your head while your sheet starts to dry.  I am not so sure that utilitarian pieces are the best use of this process but I didn't have a sculptural project in mind.  I also learned that paper clay cuts a whole lot easier with scissors than with a blade or wire.  


I love this "rolled" foot.  I enjoyed experimenting with this because it forced me to let go.  I also like that their where certain things the porcelain slab would and wouldn't do.  Because of this,  the evidence of the process is necessarily revealed such as the cracking of the surface of the clay as it was formed.  Hmm, I'm kind of liking this.  It will be interesting to see where it leads me.  

If you want to know more about working with paper clay, an excellant resource is Rosette Gault's book on the subject.


Sunday, September 09, 2012

Recent Soda Firing


Opening up last week's kiln load. Or was it longer ago than that?  I'm not sure where the time keeps slipping away from me!  Anywho, check out those cones on the bottom.  Cone 12 maybe?  All I know is my tumblers were on the bottom and I had a lot of bloating.  Maybe B-mix at this temp is not so good.  Or maybe we just need to figure out how to get the kiln firing a wee bit more even.  I know!  I'll just put my stuff on the top next time.  What a concept.  I know, sometimes I'm a tad slow.


Here are the four tumblers that came out good.  One still is pretty bloated but I turned it around for the shot.  I actually had eight tumblers but four of them cracked.  Pretty weird cracks too.  I'll have to get some pics of those too show y'all.  Could use some postulating on causes.  I have a theory but we'll see.  
I've got some bowls just like these tumblers going into the kiln next week plus I think I'll put in a couple of porcelain pieces and see how they do.  B-mix on the top, not sure where to place the porcelain but I think it would withstand the bottom.  Hey, I could put a porcelain one on the top, one in the middle and one on the bottom.  I astound even myself sometimes.  Just kidding!  Oh, and as for surface technique, that is paper stencil with a baur flashing slip brushed on.  I also used the little sewing wheel thingy texture maker and then bisqued.  Then a black slip was rubbed into the texture.  I glazed the inside with celadon but it doesn't look as good as I'd like.  Maybe not enough reduction on the bottom.


The recycle clay is liking the soda.  And check out that design and texture!  Wish I could claim those as mine.  I am thinking of stealing, ahem, borrowing, the technique.


Happy mugsy.  My tumbler in the back, otherwise known as a giant test tile.

Tuesday, May 01, 2012

How time flies!


I can hardly believe that I am halfway through my eighth and last week at Penland.  Boo hoo!  I have made far too few posts while I have been hard at work.  Yesterday and today were the hardest, busiest, most challenging and yet most rewarding days here.  We have been loading, firing and reloading kilns back to back to get everyone's work finished and out on time.  This piece was one of the first pieces I made when I got here. I am just now getting around to taking photos of my work and there will be a bunch more when kilns get unloaded tomorrow.


With both of these jars I used a technique called sgraffito which means to scratch or carve through.  I applied black underglaze to the surface and then when it was leather hard, like hard cheese, I carved through the black to white clay underneath to create the designs.  The first jar was glazed with a clear, transparent glaze.  With this second piece we had the transparent glaze colored with a bunch of different oxides and stains so I glazed each individual section with a different color.  Indeed, it was laborious but worth the effect.


We have had two wonderful core students in our class, Molly Kite Spadone and Rachel K. Garceau. Rachel mixed up a new clear that was supposed to fit Helios porcelain at cone 6 so I was very eager to try it out.  I glazed up this tumbler and put it into her small test firing last night.  Tiny kilns are wonderful in that they fire fast and cool fast.  I was able to pull this piece hot out of the kiln although I had to carry it around with my t-shirt while I admired it and showed off.  I promptly glazed up a bunch of other pieces with it.  Actually, I trusted Rachel's experience with this glaze so I didn't wait for the piece to come out.  I actually was in the studio at 6:30 am to unload kilns and get started on some glazing before the class showed up.

Speaking of our core students, Molly and Rachel are both in the Containment III show at Crimson Laurel Gallery.

Sunday, February 12, 2012

Acrylic Resist with Water Erosion on Porcelain


I've made progress on bowls that are part of the rewards for my Kickstarter fundraiser for my trip to Penland.  These are cone six porcelain that I have brushed acrylic medium on and then used the water erosion technique to achieve the texture.  I like to make two layers of texture which can be kind of dicey.  I started to see the inside of the bowl getting pretty wet in a couple of areas. Yikes!  I can't wait to see how transparent these will be when they are finished.


And here is the cute little covered jar from the last post with this technique.  Still needs some cleaning up but I love how it is progressing.

I also got started on some prototypes for some teapots.  When I finally get around to putting the handles on ( I've been misting them for four days) I will get some pics of those.  I don't have much experience with teapots so I am working on my learning curve.  On Friday, I did a fun demo with laser toner decal transfers and my students absolutely loved it!  I tried to shoot a video so that I could post it but I didn't have a large enough memory card and I had the resolution set too high.  I only got the first five minutes,  doh!  So yep, off to the store for the big mama sd card.  I think I will give it another try if I can keep myself focused.  Feel free to bug me if you don't see it sometime soon:P

Wednesday, February 08, 2012

Dreams Realized!

In the last couple of years, but in the last 5 days specifically, I have learned that if you want something bad enough, work really hard and put yourself out there that mere dreams can be turned into reality.  Before I turned in for bed last night I checked out my Kickstarter project, "Fly Me to Penland," and found out that I had reached my funding goal!  I set the deadline for March 3rd but I reached my goal just five days after launching my project!  The outpouring of love and support from friends, family, acquaintances and total strangers (who I hope will soon be friends) has been tremendous.  I now have everything I need to get out to Penland and buy my clay and pay for firing.

I am still accepting and encouraging support for the project which will continue to accept funds until the deadline of March 3rd.  I figure while I am there it would be a great opportunity to drive around to surrounding communities such as Asheville, Bakersville, Seacreast, Raleigh, and more to do research one the rich ceramic history of the area and to visit the studios of potters and ceramic artists.  Extra funding will also allow me to pay for shipping to send my work out to galleries and and for those pieces that I would like ship home.  I've tried packing it in my luggage before and believe me it doesn't work so well and there is never enough room!


I got some clay work done last night.  I threw some porcelain tea bowls that I will do shellac resist and water erosion techniques on.  I had quite a few pledges that offered these tea bowls as a reward so I figured I had better make some more.  I also got into some Great White, cone 5-6, from IMCO but it was way to soft.  I managed to get a prototype square bowl done and a little lidded jar but I have to let the clay sit out and dry for awhile before I can really get anything done with it.

Happy hump day y'all!

Monday, May 02, 2011

New Work Images

I absolutely cannot believe there are only three weeks of school left.  Normally next week would be dead week, but since we clean the studios during finals week that puts the art students ahead by a week.  Yeah! I do say this sarcastically as the realization sank into to my unprepared brain that this week would actually be dead week.  Hell week would really be a better term for it.  I vowed I would go back to school after dinner and stay up all night working but I couldn't convince my sleepy self to do it.  Tomorrow I will have to be better prepared with packed meals, snacks, rewards, anything that will keep me going because I have tons of stuff to do.  Did I say TONS of stuff?  Oh boy, I do NOT have time for sleep.  So bring on the veggies, vitamins, brain food and could you throw in some extra energy, pleas

By the way, here are some more images from my culminating exhibition.  I can barely believe I will be graduating in three weeks.  It felt like it was going to be so far away and for so long.  Not anymore.  I will officially graduate in three weeks with my Bachelor of Arts Degree.  Excited and relieved are understatements.  I am falling asleep as I type so forgive me if anything is illegible.  Have a great week.

Sunday, April 18, 2010

Sculpture from my solo show.


I have a head cold today and I'm not feeling so hot but here are some shots of the gallery were I had my very first solo show.  This is the view from the entrance to the gallery.  This piece in the front is porcelain fired to cone 10.


These pieces are earthenware with underglaze and sgrafitto.

The two pieces here in the foreground are porcelain and the two behind are stoneware.  I had a hard time taking these pictures because of the lighting. I had a mix of natural light, fluorescent and halogen.  I also had some depth of field issues.  I might go back and try to shoot some more shots before I take the show down on Thursday. 

Tuesday, March 30, 2010

Lights, Camera, Action!


I finally got all of my sculptures installed in the gallery this morning.  That is, Monday morning, now that it is shortly into Tuesday.  I have done many arts and craft fairs with my pottery but this was the first gallery show with sculpture.  I had wonderful help from many people.  Special thanks go out to Allison, Cameron, Jenny and Charlene.  I couldn't have done it without you people.  You are very appreciated!


It was pretty crazy getting all of my pieces out of their boxes and setting them up.  I got all of the wall pieces set up and it looked great.  Then I set everything up on the pedestals and I had WAY too much work for the gallery space.  I maybe could have quit making things a month ago and it would have been fine.  However, I am grateful that I had too much rather than too little.  With lots of help I got the pieces edited down so the space wouldn't look cramped.  This small porcelain piece is about eight inches tall.  I really wanted it in the show along with another black and white piece but they just wouldn't fit and didn't quite work with the other pieces which are quite different.


I like this graphic design and the contrast so much that I am thinking of making a body of work that is all black and white.  That will be quite a departure for me as I am so into color.  This piece originally started out as a test piece.  I  had two forms and some slip left from a throwing session.  I decided to mix some black stain into the slip until it "looked right," although I wasn't sure what right meant.  I didn't know if I would get some shade of gray or what.  This is cone ten and it came out this fabulous rich black with hints of cobalt.  I hope all you clay people who are going to NCECA or, are already there, have a great time.  I hope to make the trip to Florida next year.  I have never been and I want to meet everyone.  Have a great Tuesday.

Wednesday, March 17, 2010

Porcelain Carves Like Butter!


Good morning everyone.  Spring is almost officially here!  It is so exciting.  I thought I would make this quick post before I head off to my super duper busy, catch up on everything day so I can take some time for myself soon. Phew.  This piece is in the bisque as we speak.  It's a slightly different form from what I have been working on.  I was getting tired of the sharp angles where my round forms would me and I wanted a more gradual transition for easier carving and resist work.  Everyone in the studio, including myself, thought it looked kind of like Mickey Mouse.  What can I say?  I grew up in Southern California and Disneyland was a very regular destination.  Can I help it if those Mickey ears are ingrained in my brain and influence my subconscious choices in form? 


I am really enjoying the way it has turned out, being a small test sculpture as it is.  This is made from cone 10 English Porcelain from Laguna Clay Company.  I love this clay.  It fires very white in reduction, is translucent when thin, has a slight self-glazing characteristic and is relatively easy to throw with.  And did I mention, it carves like butter!  I am in love.  I took my slop clay from my slip bucket and turned it into a thick slip and then added about a teaspoon and a half of commercial black stain,  Then I brushed three coats on the piece and let it set up before carving.  It was interesting to find the right consistency for carving and how effective it was to carve different areas that were drying at different rates.  It turned out being on the dryer side of leather hard made for cleaner carving.  I can't wait to glaze this up and see how it turns out.  Wish me luck.