Showing posts with label Ceramics. Show all posts

Monday, April 28, 2014

Using Paper Stencils to Create Pattern and Texture

I am currently taking an instructional development class in preparation for teaching next semester. One of our assignments was to create a ten minute micro lesson. Here is the handout that I created to accompany the lesson.


Paper Stencils Micro Lesson
Instructor: Kelly Daniels
University of Massachusetts Dartmouth
Fall 2014
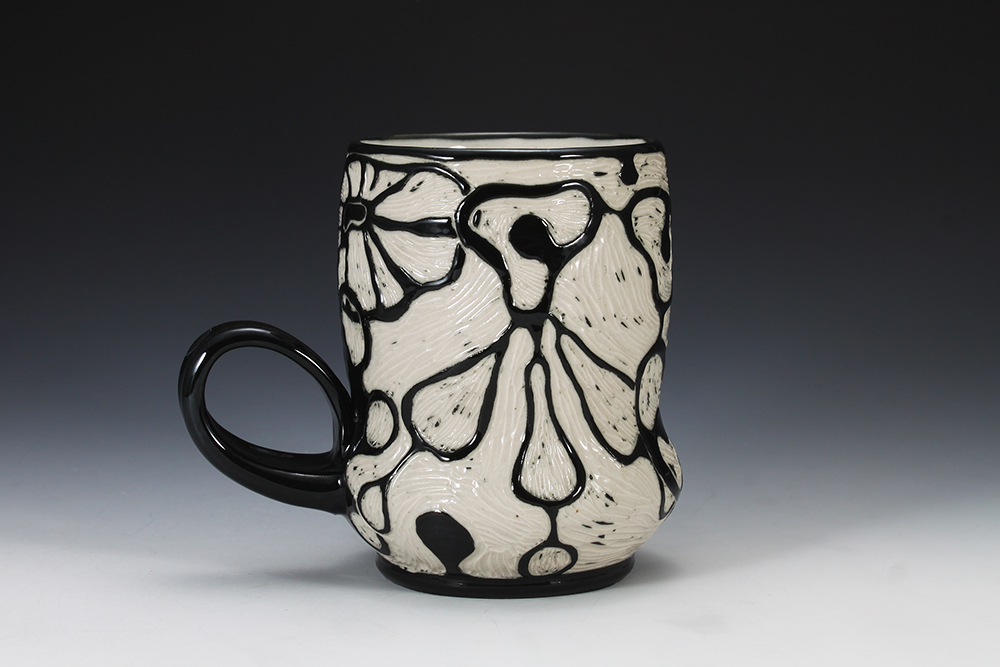
Using Paper Stencils to Create Pattern and Texture on Clay
Objectives:
        1. Identify papers to be used for stencils.
        2. Learn basic methods for creating stencils.
        3. Determine when and how to apply stencils to clay.
        4. Discover what materials to apply over the stencils.


Materials:
1.5” Wide Hake Brush
Unprinted Newsprint Paper
Slips, underglazes, engobes.
Water
Scissors
X-acto type knife
Pin tool


Procedures:
1. Determine paper to be used.  For this demonstration I will be using unprinted newsprint.
2.  Draw a shape on your stencil. This can be symmetrical or asymmetrical.  For multiples, fold the paper and draw shape starting at the fold line “paper-doll style.”
3. Using scissors or a blade, cut out the stencil.  Either, or both, positive or negative images may be used as the stencil.IMG_1170.JPG
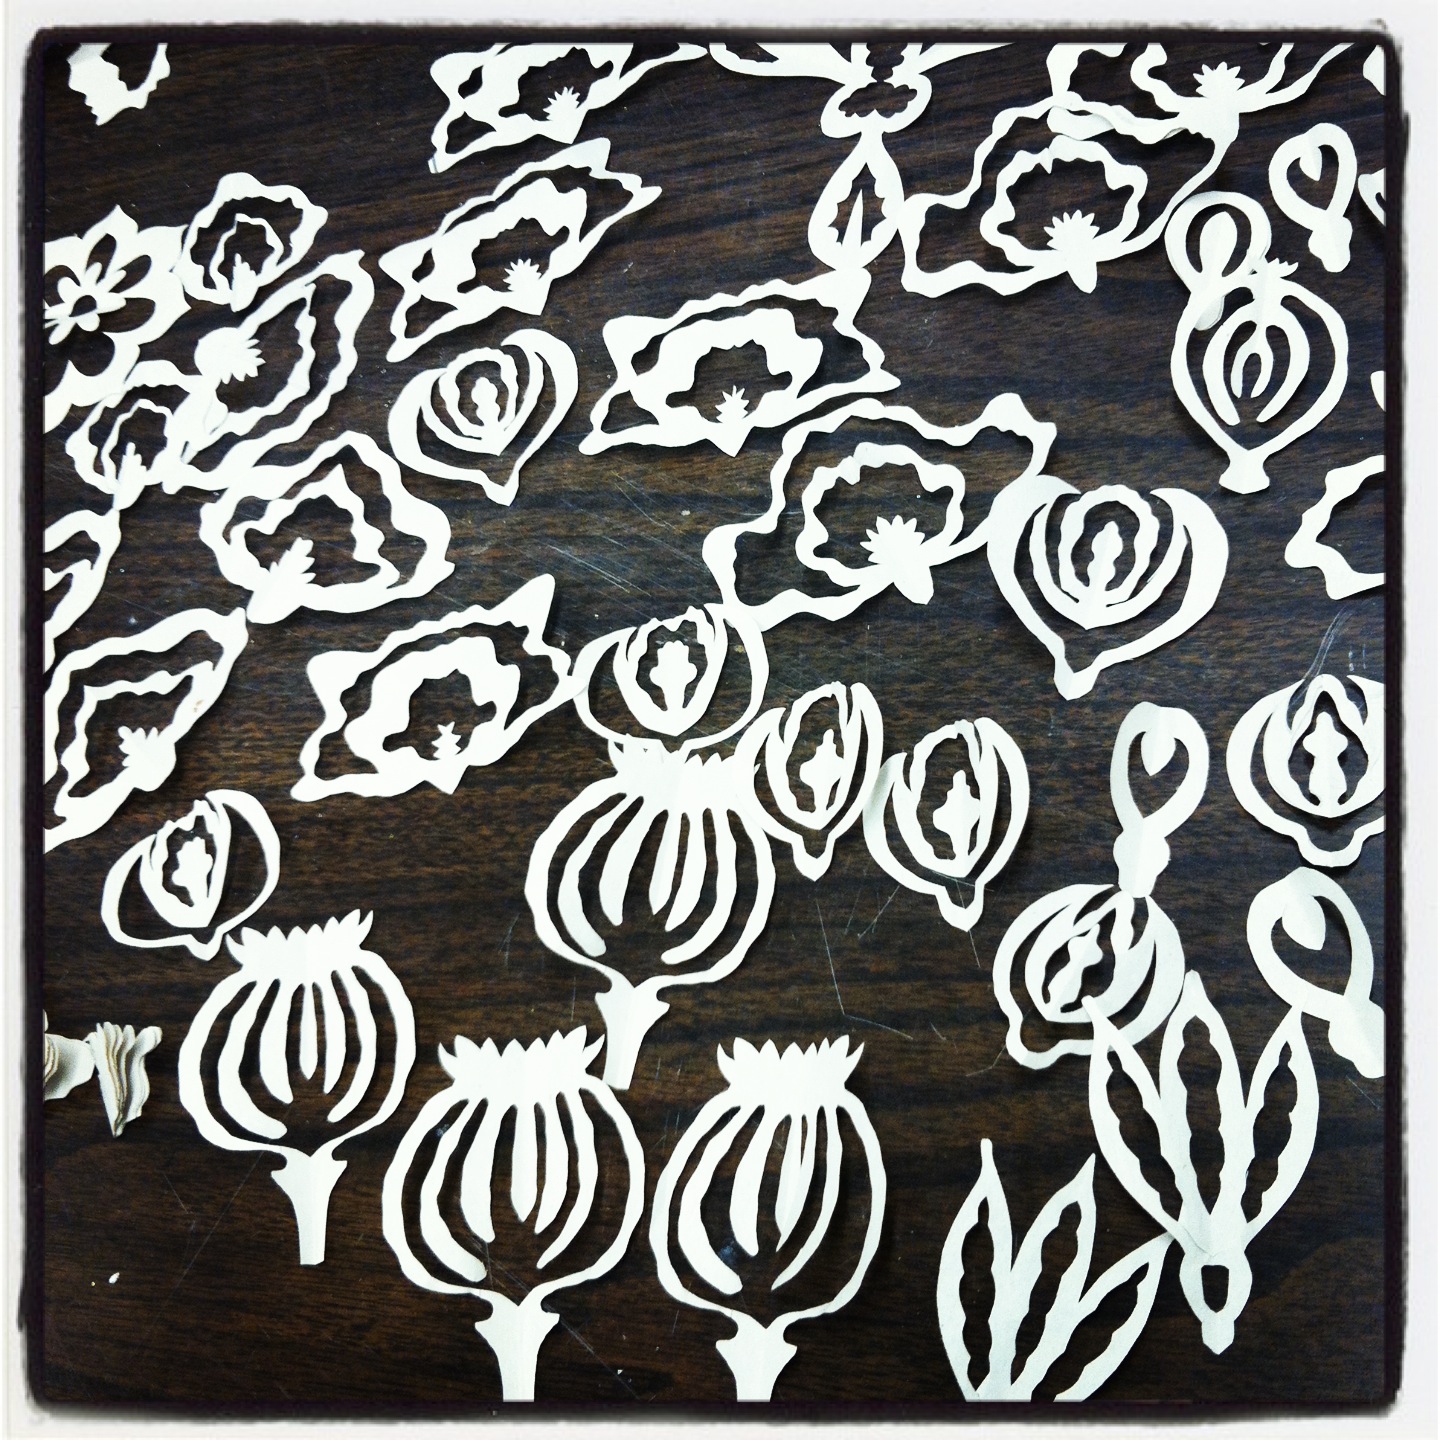
4. a)Dipping method: Gently dip stencil in water and carefully place on leather hard clay surface.
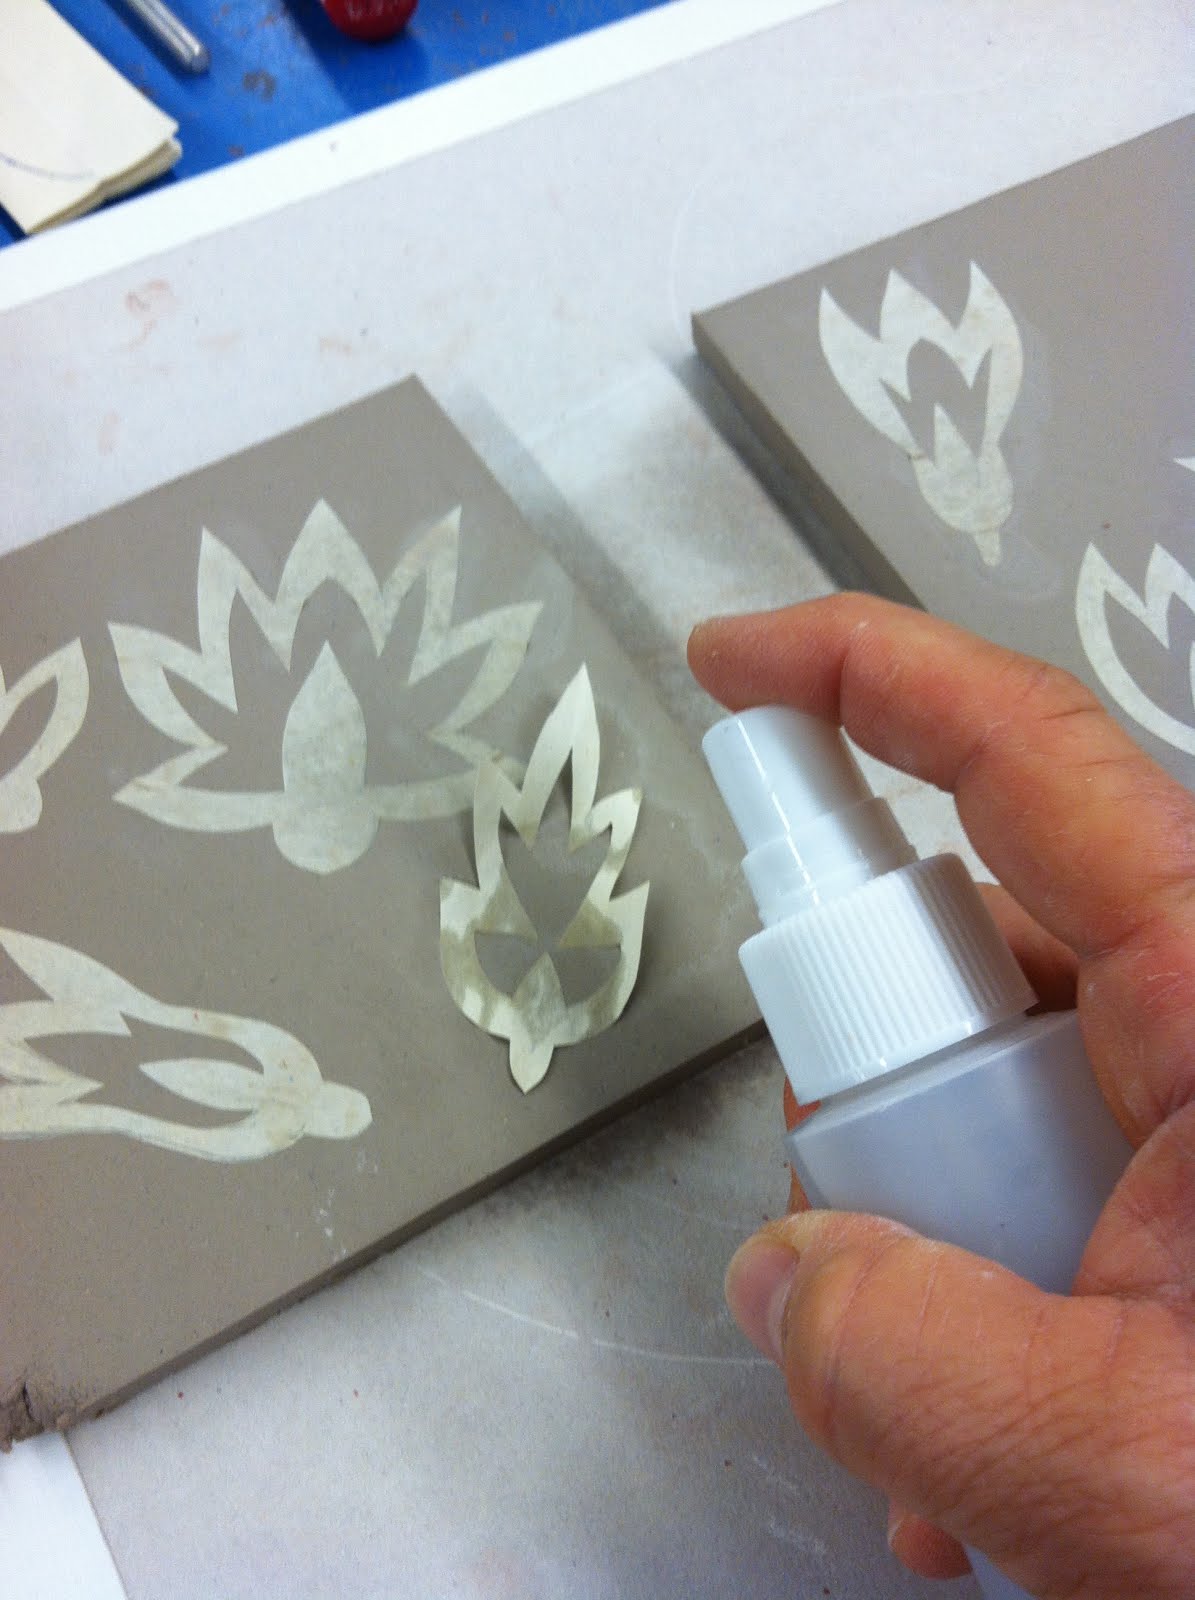
   b) Spray bottle method: Using a fine mist spray bottle, first spray the surface of the clay where you will place the stencil. Next carefully lay the stencil down on the clay and spray again to wet the stencil.
IMG_2413.jpgIMG_2414.jpg
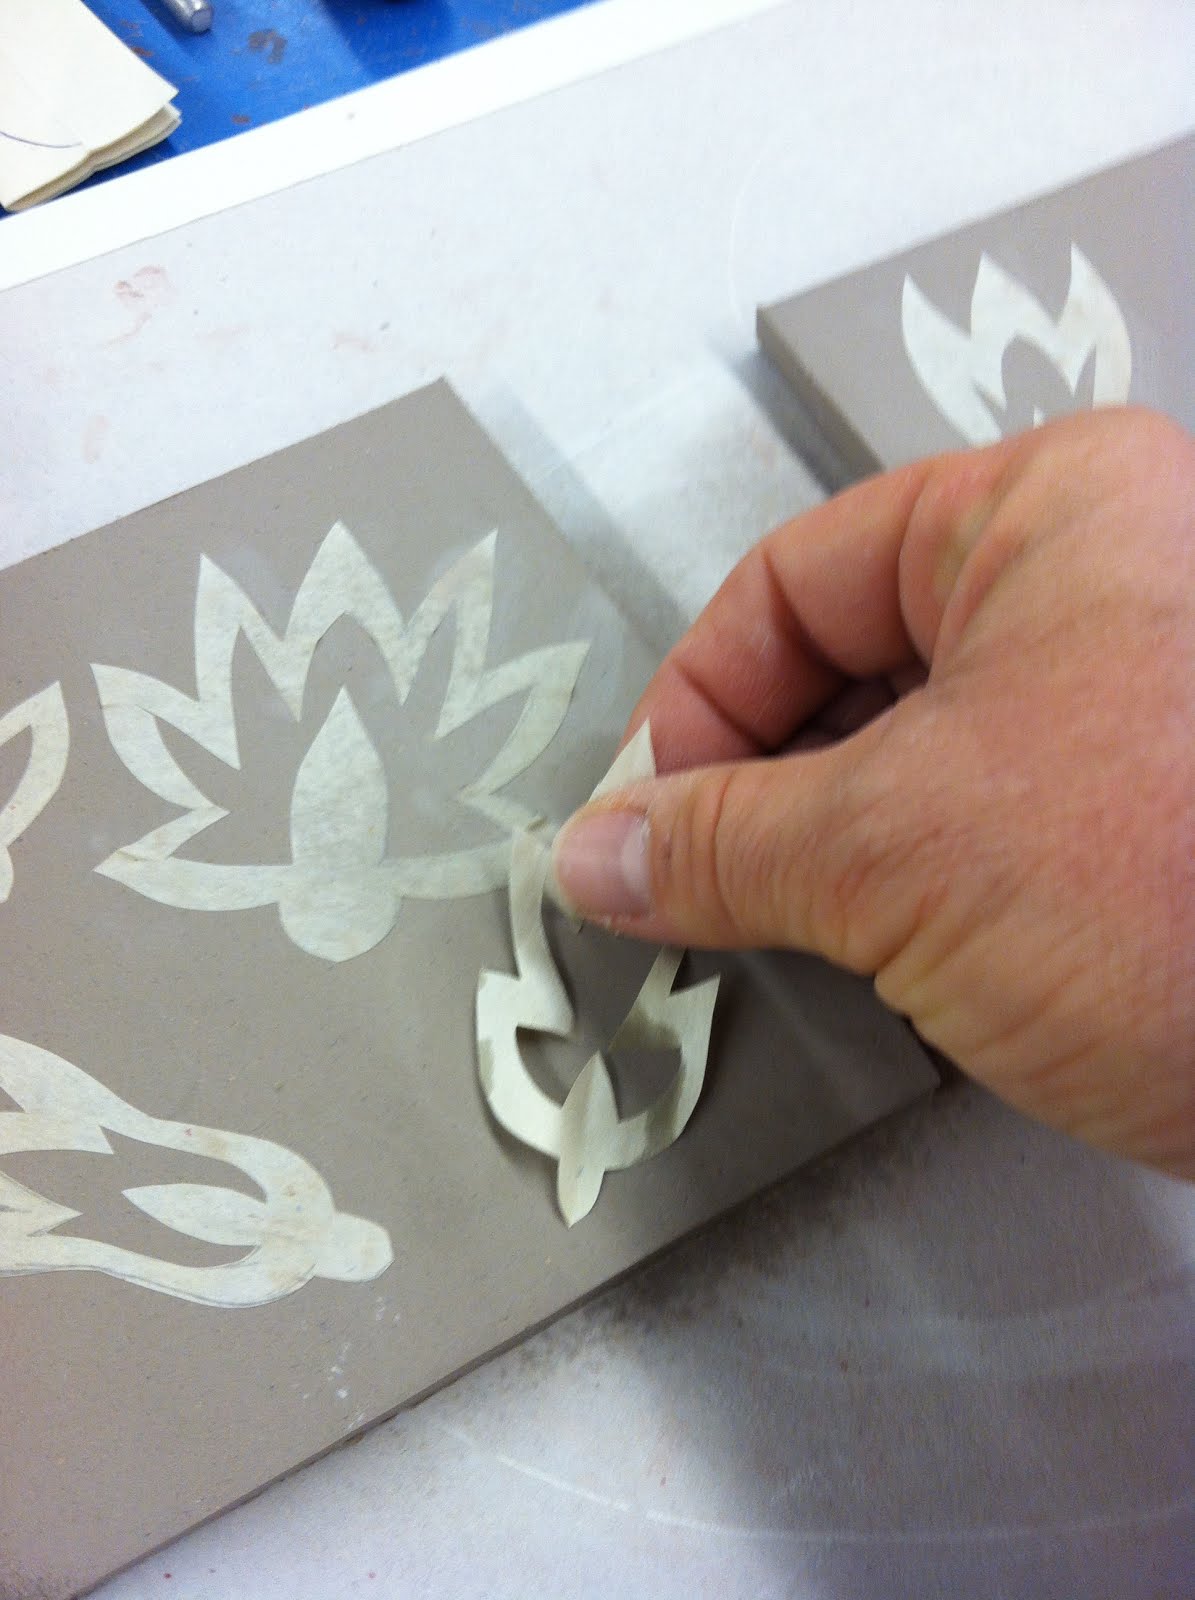
5.Gently smooth out wrinkles. Use a wet finger, brush, or spritz from a spray bottle to lift, smooth, or readjust the stencil.
IMG_2421.jpg
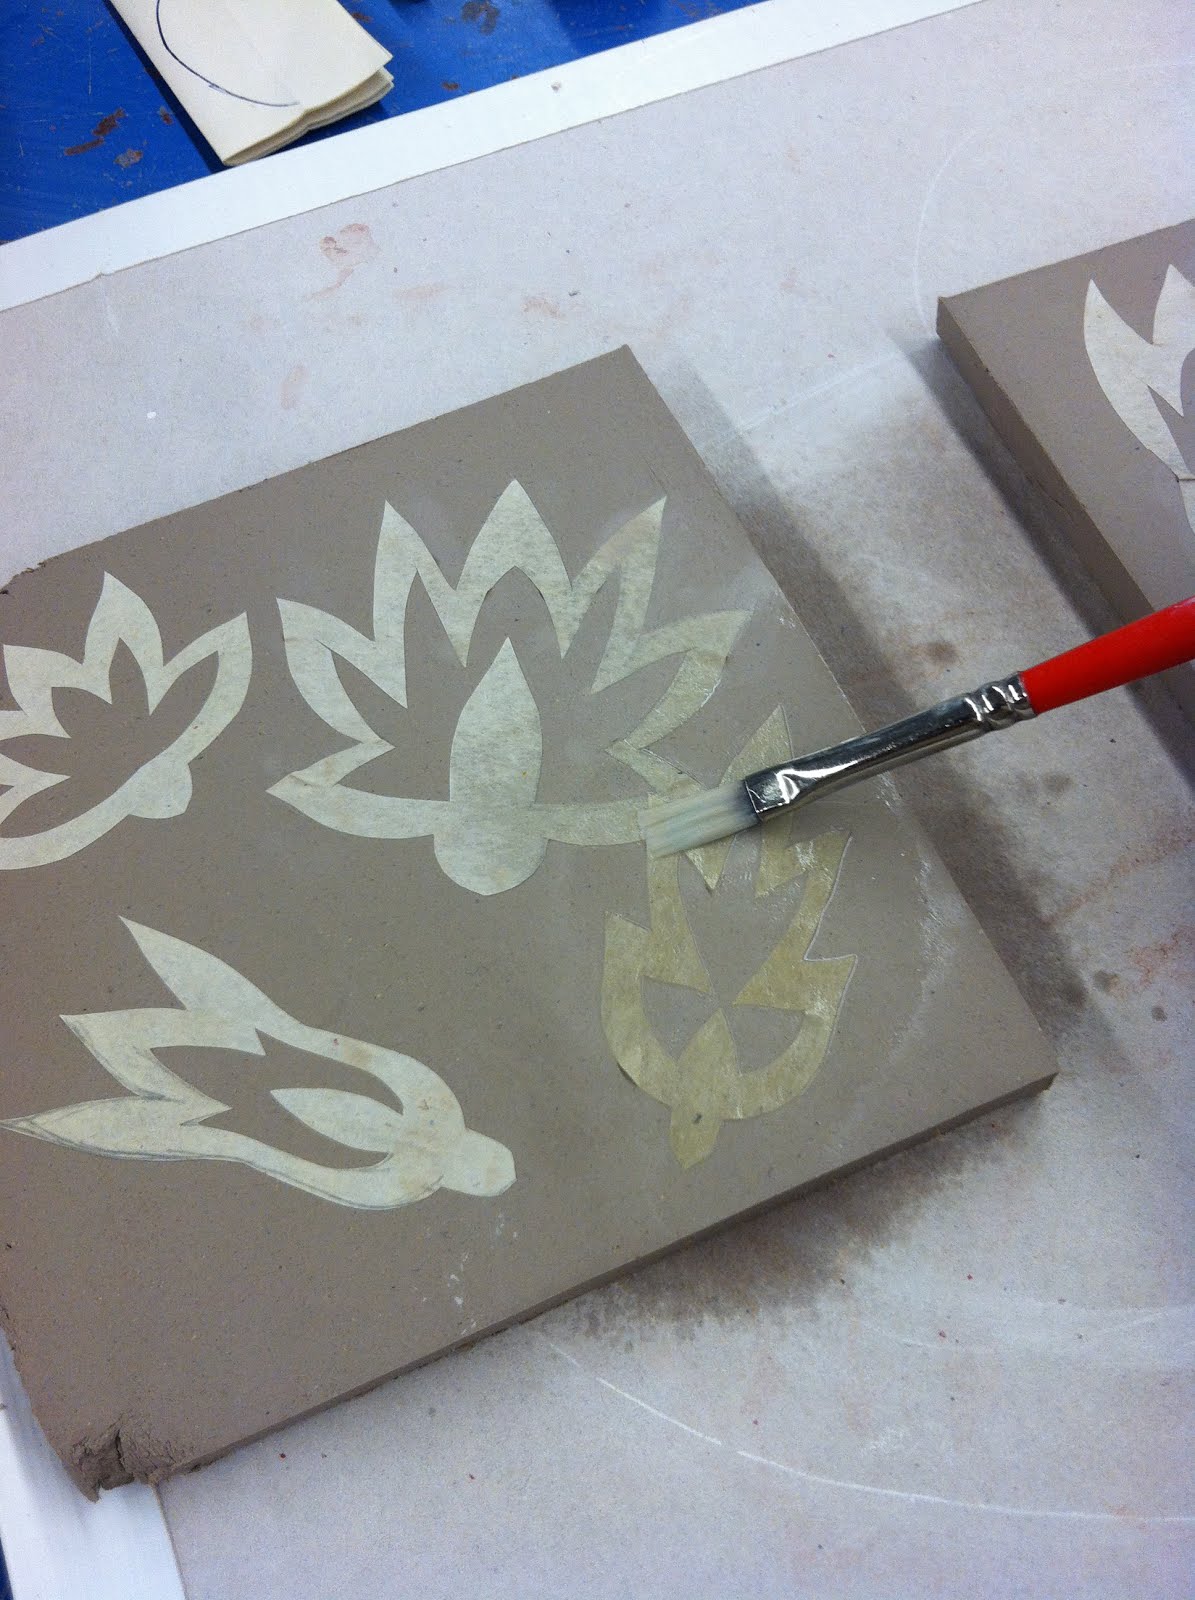
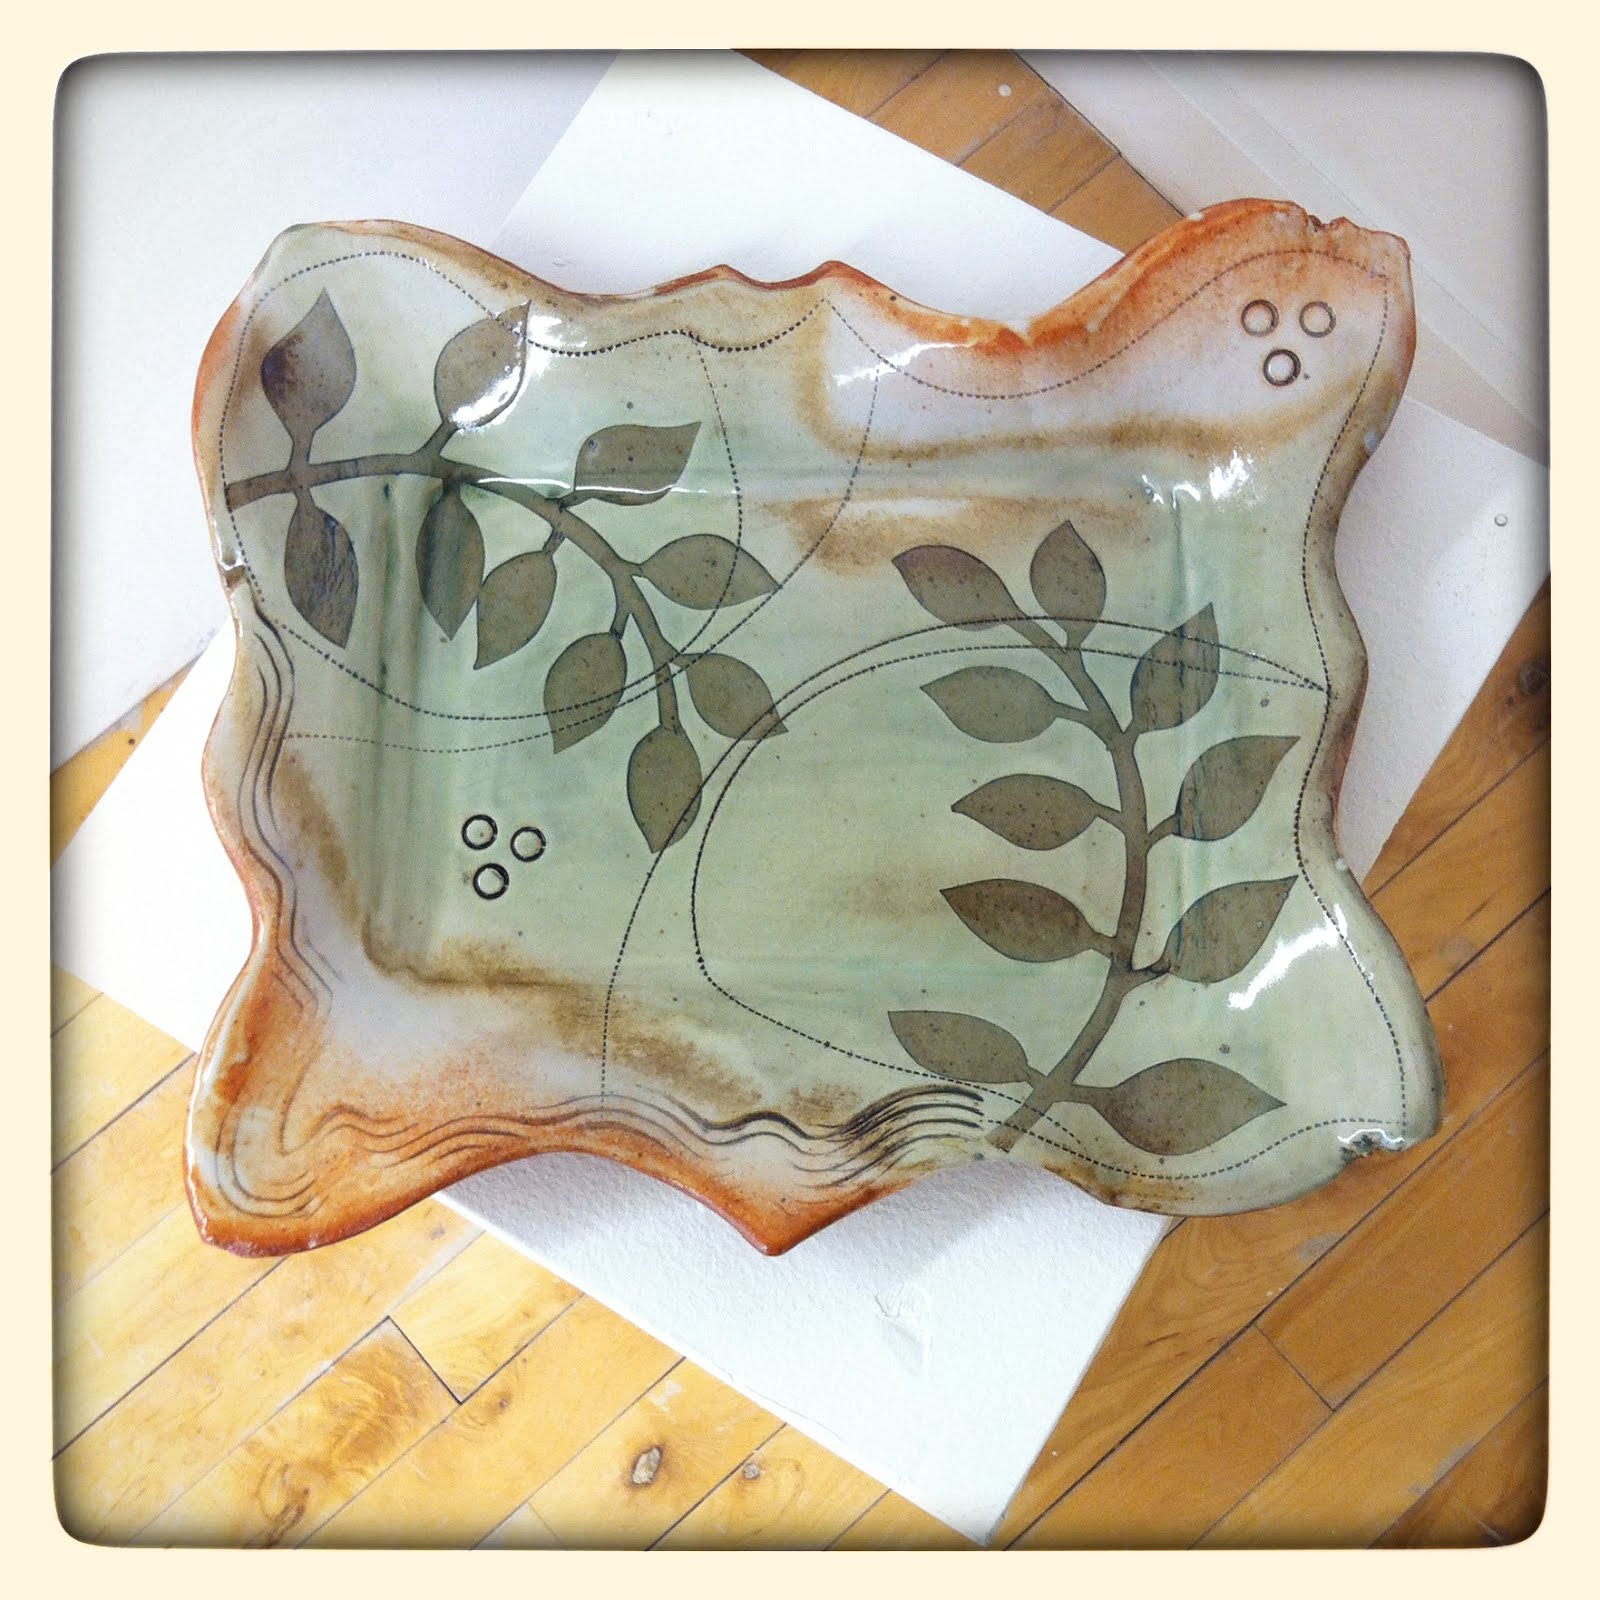
6. Allow the stencil to begin to dry until it is just damp and lighter in color.  You will see the paper change colors as it begins to dry out. (See example of color change in above images.) You don’t want the paper or clay to completely dry out.
7. Using a soft bristle brush apply slip or underglaze to your piece.  Use one to three coats depending on the density of color or amount of texture you desire. When applying multiple coats allow the previous coat to dry to leather hard before applying the next coat.
IMG_2487.jpg
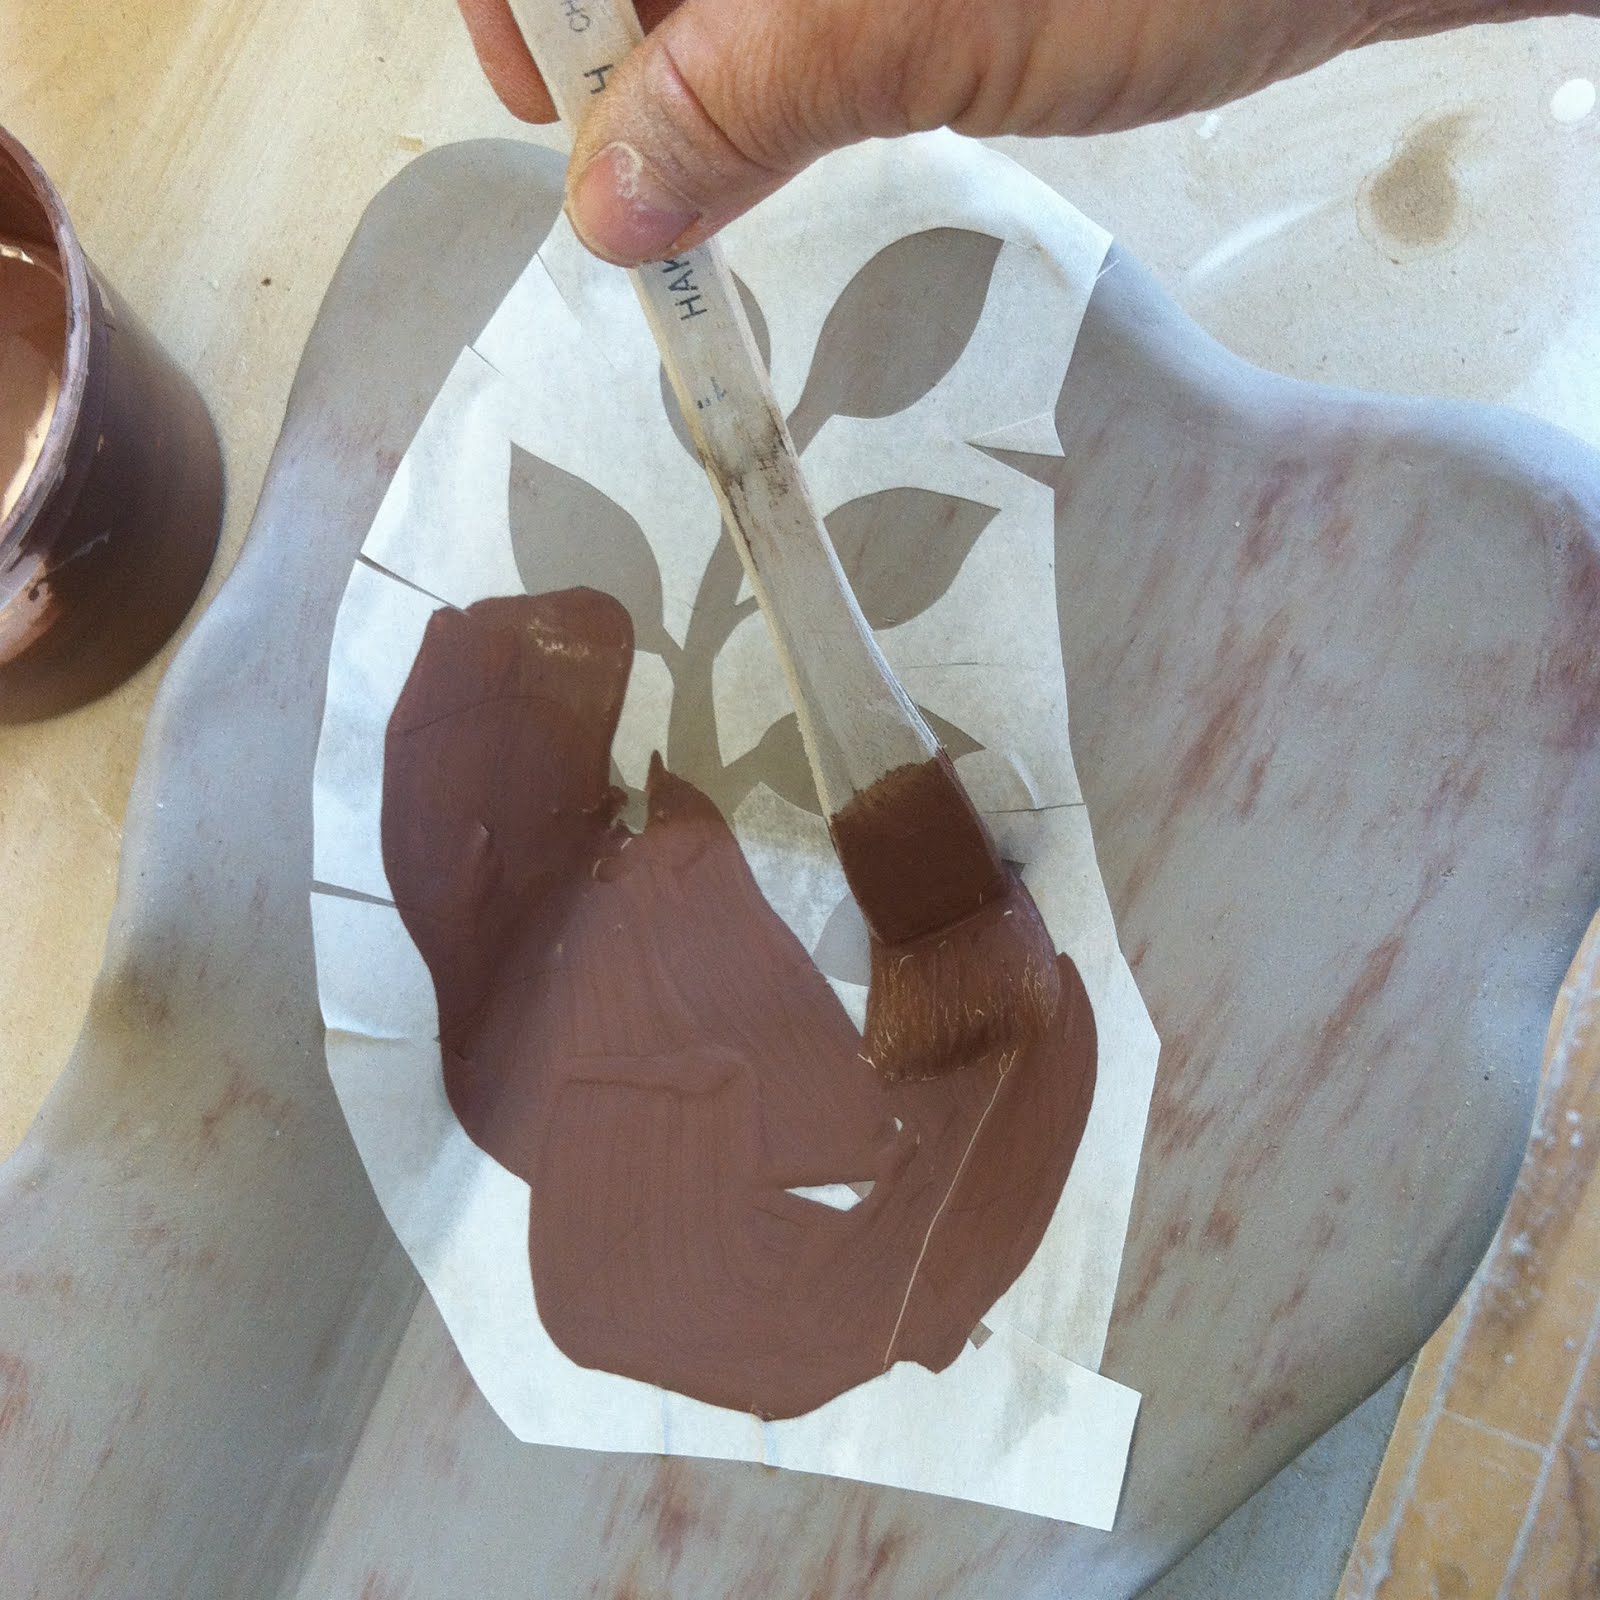
Note: airbrushing can also be used to apply slip or underglaze and allows for nice gradations of color.  However, this will not be demonstrated.
8. After applying slip your piece may have soaked up a noticeable amount of moisture so be careful not to move or cause the piece to warp.
9. Allow your piece to dry to leatherhard again.
10. At this point you can start applying more stencils if you wish to achieved layered effect.
11. When all stencils and slips have been applied and your piece has dried to leather hard you can start to remove stencils.  Usually the areas where the stencils are will have dried faster allowing for easier visibility.  To make the stencils even easier to see a hair dryer may be used briefly to dry the stencils more.  Use a sharp blade, like an x-acto knife, or needle tool, to gently lift of the edge of the stencil, then grab ahold of it and peel it off. Throw away the stencils, they cannot be used again.
IMG_2490.jpgIMG_2494.jpg
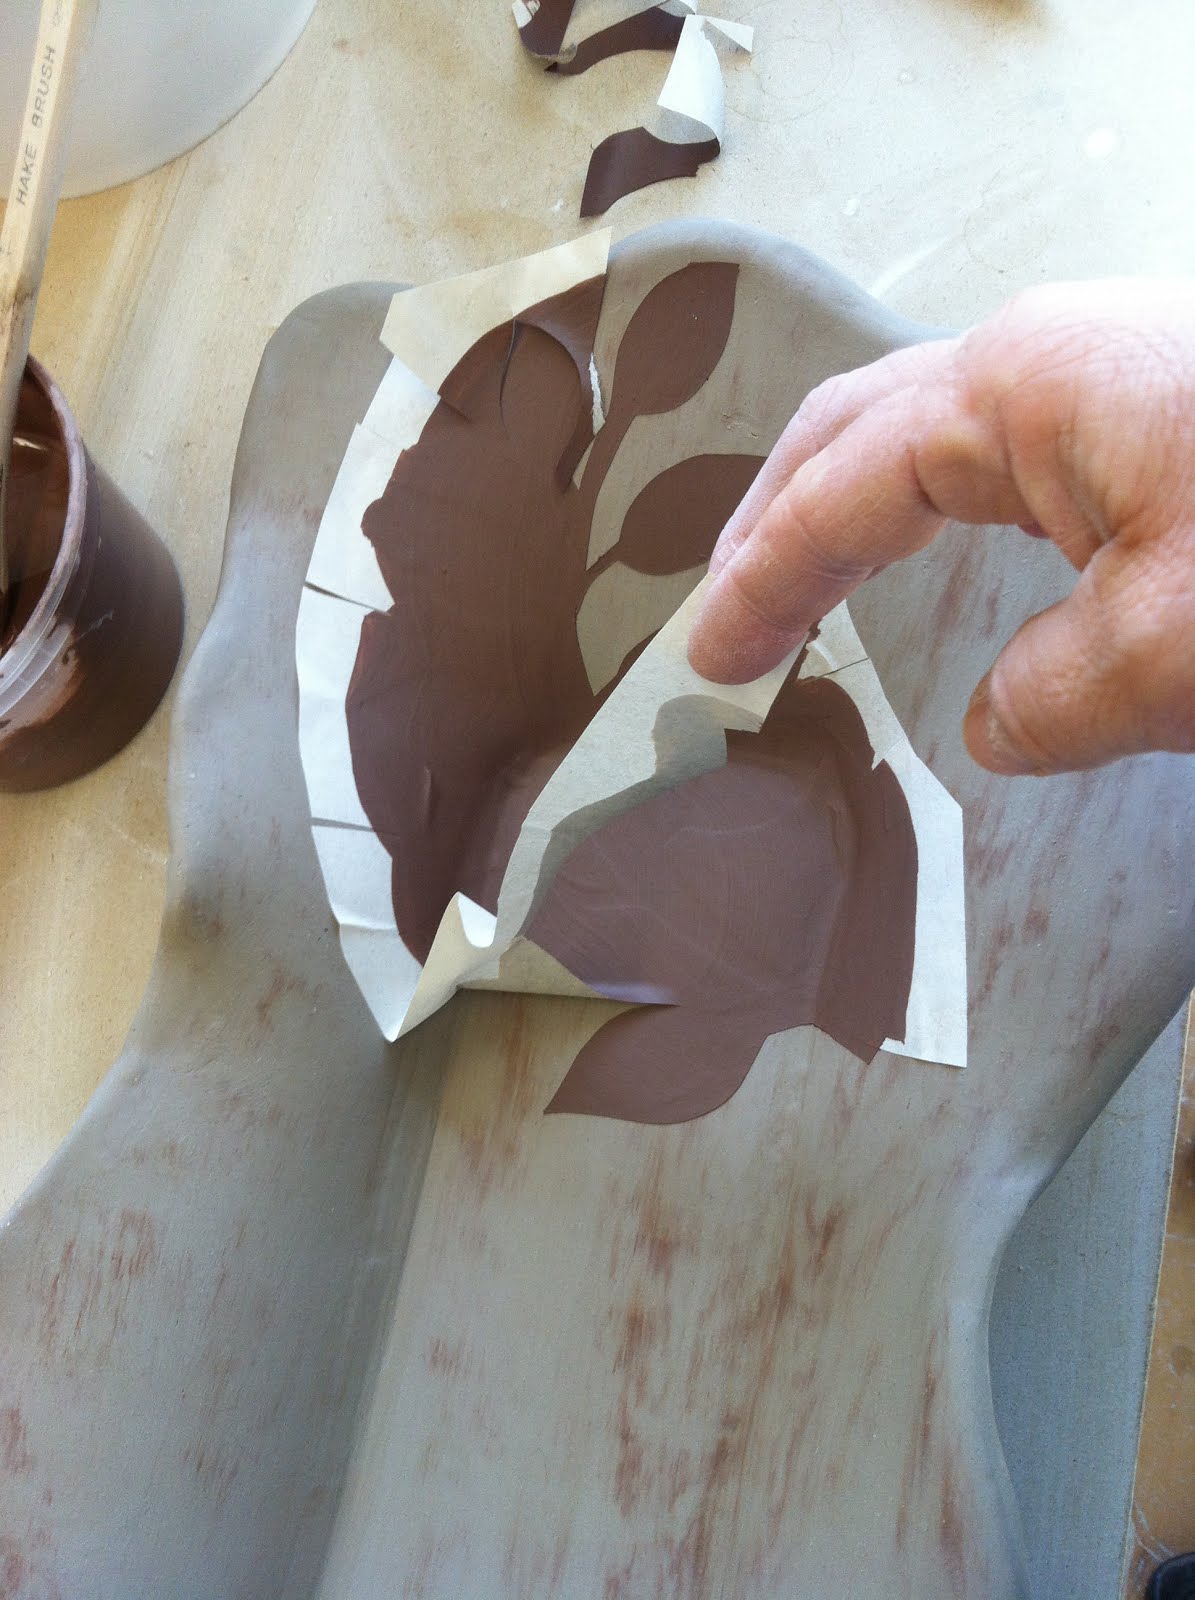
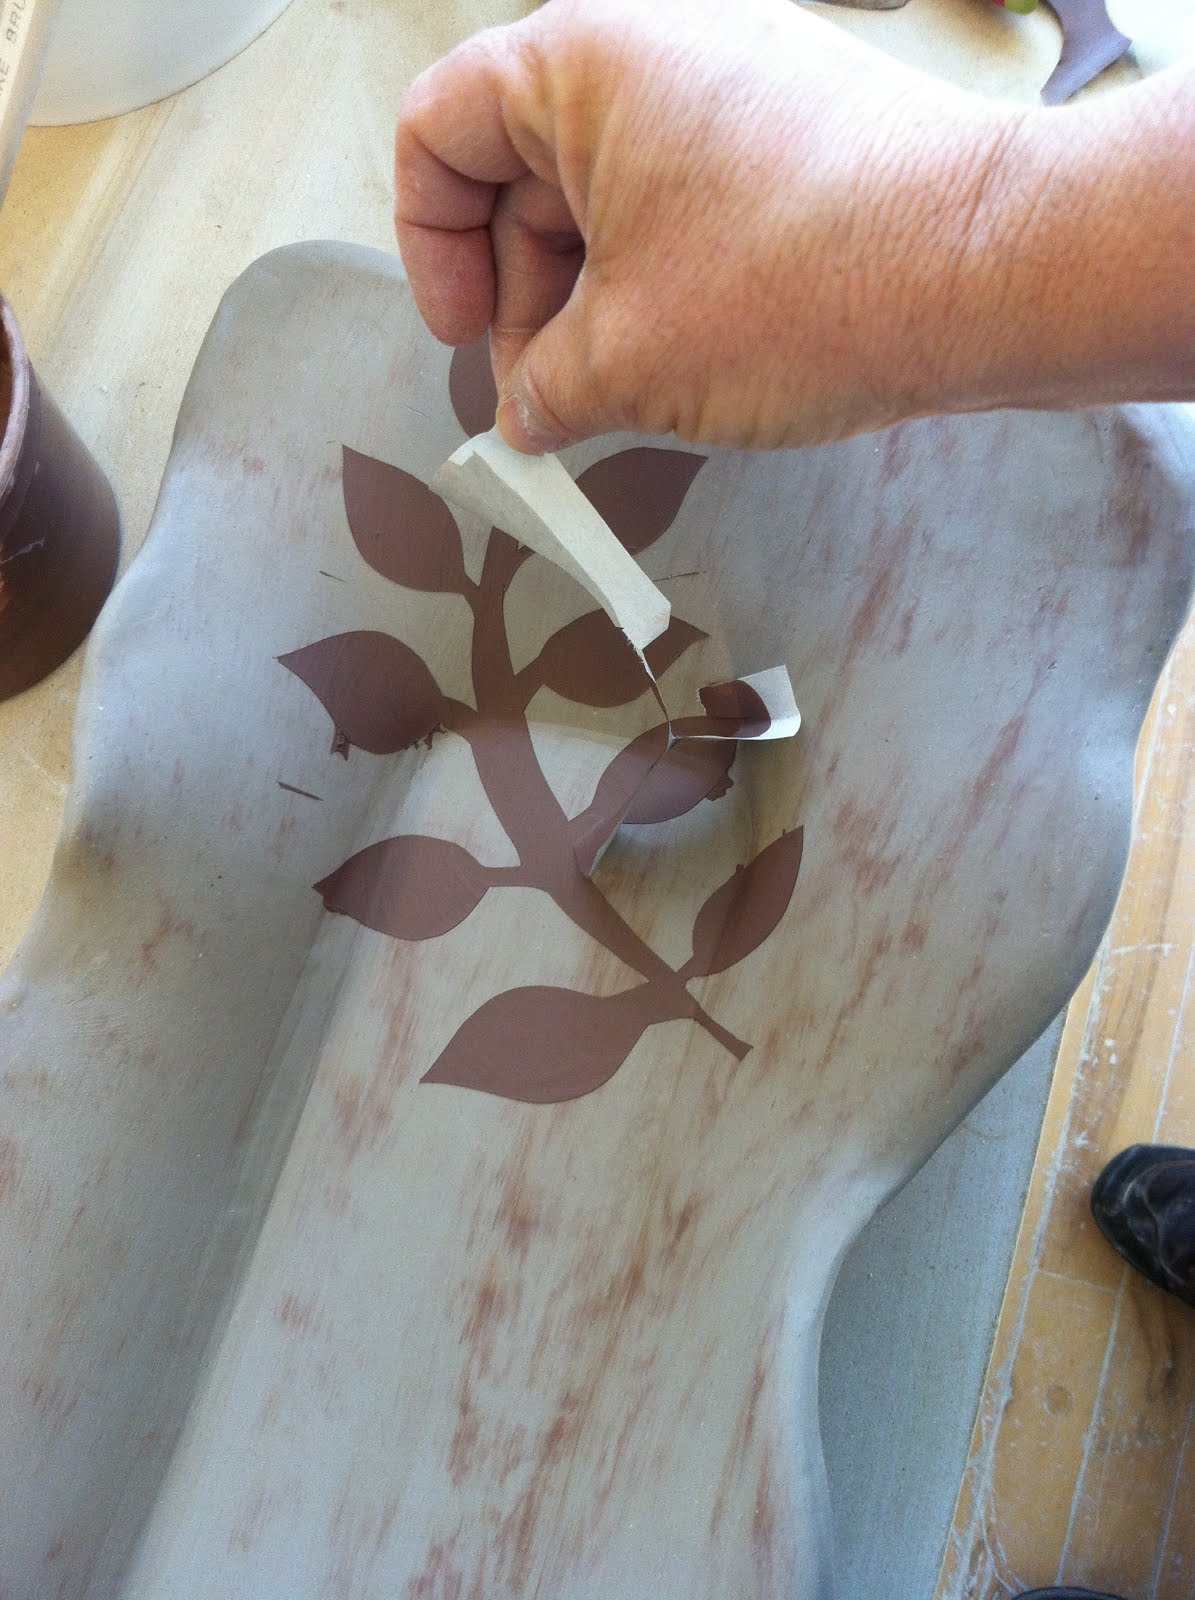
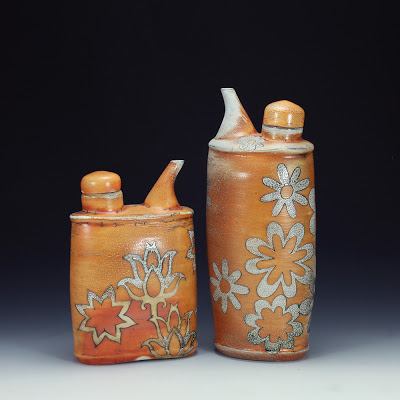
12. Many interesting effects can be achieved by using multiple stencils to create patterns and employ shallow relief and overlapping images.


IMG_2575.JPGSoda Ewers Web.jpg


Definitions:
Stencil - a thin sheet of cardboard, plastic, or metal with a pattern or letters cut out of it, used to produce the cut design on the surface below by the application of ink or paint through the holes.
Leather hard - clay which has reached a stage of dryness that is the consistency of leather or hard cheese.
Slip - liquid clay: can be made from the clay body you are using or formulated from a recipe and can also be colored using oxides or stains.
Underglaze – a commercially prepared product similar to slip but with a lower clay content.  Comes in many colors.
Additional Resources:
www.ceramicartsdaily.org
Enter paper stencil in the search bar and quite a few resources will come up.
Zygote Blum on You Tube
Meredith Host on You Tube
Due Date (Hypothetical):
        October 1st Greenware
        October 14th  Glazed and fired

Monday, November 11, 2013

Grad School Adventures

Excuse the absence, I'm in grad school dontcha know? For the most part I have been posting updates to my Facebook page. I am not entirely certain why I haven't wanted to blog, except for the fact that I have been utterly and extremely busy.  The past four months have seen tons of changes, successes, failures, stress and excitement.  So, if you want to challenge yourself, move cross country and go to grad school!

College of Visual and Performing Arts, New Bedford Campus, Star Store. I'm up on the fourth floor in a huge studio space.

My space when I first moved into it in September.  I actually had a month in New Bedford without a car and no studio access.  I got a little depressed.  I rode the bus around, got a library pass, walked a lot and had a scare with bedbugs.  

The view out my studio window.

New Bedford is kind of an odd little town.  It's history is the fishing industry and mills and there tends to be a lot of poverty here.  There are pockets of wealth and pretty houses but to get to some really gorgeous scenery one needs to drive about five minutes out of town.  This is the harbor filled with fishing boats.  The area is known for it's historical ties to whaling and Herman Melville's Moby Dick.

Fall is truly setting in and one of my favorite places is this little park about fifteen minutes out of town on this little salt marsh pond.

One of the first things the grad students did after school started was take a trip to New York City to see some incredible exhibits at the museums.


So, I actually have been making work!  This is the result of my first soda firing and also what I set up for my first crits and reviews.  I was pretty pleased with how this came out in spite of the fact that I had a cold and was sick from an abscessed tooth.  I kept trying to figure out why I was so bleary eyed and delirious.  It was the hardest and felt like the longest firing I have every done!

Now I am busily trying to catch up and getting work made for finals.  Oh yeah, and there is that paper and presentation I have been seriously procrastinating.  See ya' later, I've got a kiln to check on!


Wednesday, May 08, 2013

Photos, Show, and Packing


Today I am trying to catch up on photographing all my pots from the last two soda firings.  I am feeling waaaay behind and just a wee little bit stressed.  I need to add these pics to my website, make a power point presentation for Penland
, where I am going in a little less than two weeks.  I need to pack for the trip.  I also need to start packing for my big cross country trek to grad school.  Plus, this weekend I will be showing and selling my work at ChiVAA's Art Fiesta.  Thank goodness I have friends and family to help me out with display equipment and set up!


I love the way the pots have turned out in the last couple of firings.  I have learned tons in the last year of my soda experimentations.  I finally reduced my soda amount by half and really pumped up the reduction and I think I am starting to get the feel of how this works.  I am loving the forms of these bottles and I think I will work on some more of them when I am in North Carolina. Bye for now. Gotta try to get on top of stuff.


Come on down and see me this weekend!

Tuesday, April 30, 2013

Clay Rocks!

So much clay, so little time to blog about it!  Here is a little recap of last weekend's Chico State exhibit at CCACA clay conference in Davis, CA.


Rick Barnett

Kara

Chaz Jay

Chaz Jay Detail

Toni

Amanda Swede Detail

Mallory Russell

I'll update with proper names and titles after I come back from the university tomorrow.

Friday, March 08, 2013

Soda Fired Pitchers and Mugs


Here are the results from my soda firing last week.  I've been having fun pairing them up and seeing how nice they look in good light and on the nice backdrop.  I think I am going to be ordering some business cards soon so these photos will be great for that. I love to order my business cards from Moo.  They are my favorite! I still have a lot more pictures to take before I'm done so that's what I will be doing this weekend when I am not lounging in the sun.  I am so excited for daylight savings.  Yippie!  Next week we should be putting in another soda firing.  Have a delightful weekend.


Tuesday, March 05, 2013

Comfort Food


So, I am feeling pretty bleh today.  We have had unseasonably gorgeous weather here in Northern Ca. Last week it got up to about 77 degrees F.  Phew, in February, no less.  It has been truly wonderful.  Now there is a storm blowing in and who knows?  Maybe it just has me in a mood.  On the up side.  A friend of mine has ducks that have been giving him more eggs than he knows what to do with.  Who knew ducks keep producing eggs durring the winter?  So, I cheerfully agreed to take some off his hands. Now, people who know me will have their eyebrows lifted in a question mark.  Because when I think of eggs, I usually think, EEEWWW YUK.  Yea, I am not a big fan of eggs.  Unless, that is if I am baking with them.  I will eat them, though for protein when I am tired of tofu.  But it has to be like, a little egg with those veggies, please.  Like that veggie scramble up there in my delightful little Erin Paradis bowl that I got at Crimson Laurel Gallery in Bakersville, NC last spring.  Can you see any egg in there.  I didn't think so.  One egg and a whole lot of veggies, spices, salsa, and olives just to make sure.


Now, eggs are eggs are eggs.  But try as I might tell myself that they were just bigger, fresher, better versions of chicken eggs I was a little squeamish about using them.  So I figured it would be best to try them out in brownies first.  Yup.  I killed two birds with one stone.  Comfort food and new territory, albeit, a teeny tiny challenge.  Now they were scrumptious, but I don't think nearly as beautiful as this Sharon Virtue tile I picked up last summer at the ACGA show in Palo Alto, CA.

And...don't you think these images are fun?   I got a hand me down iPhone 4 so I could finally play with iPhone photo artistry.  Alright then, I am going to pull up my big girl panties and get out of the house!

Monday, February 18, 2013

P is for pots and photos!


I've spent most of this past week shuttling pots back and forth between studios and prepping for a firing that I want to do next week, weather permitting.  I might get delayed a bit on that since a storm is rolling in Monday afternoon.  We might have to push the firing back a bit, oh well.  More time to catch up on my throwing.  


Last summer I took a photography class at CSU Summer Arts.  One component of the class was iPhone photography, taught by Dan Burkholder.  There was only one problem.  I don't own an iPhone.  That is until a few days ago.  Yay me!  Now it isn't a new phone, but thanks to a certain, special someone, I was gifted with an iPhone 4 which is just fine with me. So when I haven't been working on pottery, I have been trying to figure out how it works and pouring over my copious notes from Dan's lectures and demos.   And of course, downloading and trying out photo apps.


I have a thing for water towers and Chico has quite a few good ones to photograph.  I decided to spare my poor kitty and hit the streets around my neighborhood.  The weather has been incredibly warm and very much like spring is upon us.  Oh yeah, I had fun!  So if you don't see pottery here just know that I got deeply distracted and lost in photo land.  


Friday, February 08, 2013

A Speck of Sun


After yesterday's post I headed over to my friends studio to hang out with the Claymates and work on some of these fun mini vases.  It was mostly an ugly day yesterday but the sun came out just long enough for me to run these outside for a pic.  After I got home the deluge started up again.  I'm not sure why but the rain really bugged me yesterday.  It made me sort of anxious and then I realized the water was dripping loudly on a bucket outside so I moved that and it was a little better.  I also looked up the weather report for Massachusetts and Rhode Island where they are predicting a historical blizzard.  Suddenly, I didn't feel quite as bad.  I finished off the evening by cleaning up my studio so I can have a fresh start on some more work.  Now if I can just keep up the momentum I will have enough new work that I wont keep missing out on calls for artists.  Have a great weekend!

Thursday, February 07, 2013

My Micro Ceramics Studio


You really don't need a whole lot of space to make your art or craft.  My ceramic artist friend, Jenny Mendes, has a very small studio.  When I moved into my small duplex last summer I was inspired by Jenny to convert a corner of my tiny kitchen into a micro studio.  The space I am working in is only about 5 by 6 feet, or so.  I haven't actually measured it.  The slab roller just barely fits into the space between the refrigerator and the window.  My pottery wheel slides under the slab roller when not in use which also makes it easier to get out my back door which is right next to the window on the right.  On the wall opposite the wheel I have a shelf to hold work in progress but it is usually covered with tools, supplies, slips and random junk, causing me to occasionally spread out into the leaving room or out on the back porch in good weather.  I try to keep it really clean by mopping and wiping my shoes on a rug so I don't track clay throughout the house.  So far it is working great and I am getting a lot made.  Plus, I think everyone should have a great big refrigerator right next to the work space to post all sorts of inspirational material on.  The close proximity of food does not seem to distract me but I do enjoy sustaining my practice with the frequent consumption of dark chocolate!


Unfortunately, my studio does not have a kiln so I fire my work in a variety of places from friends studios to places like Penland School of Crafts.  I've often thought it would be fun to have a mobile studio on wheels since that's what my car feels like when I am transporting supplies, tools, and work in various stages around town.  But I actually really enjoy this chance to get out and be with other people and not be holed up in my studio like a hermit all the time.  I frequently make work in the studios of my friends which is great for socialization as well as inspiration and feedback.  


This is the most recent batch of work that has been happening in the micro studio the past couple of weeks.  These here are still wet today.  I was up until about 1am happily working away on these and watching movies on Netflix.  These will be going into the first soda firing of the 2013.  I can't wait to see how they turn out.  I am aiming to get the firing going next week or at the latest, the following.  


I just decided to incorporate some sgraffito into these pieces inspired by the tutelage of the fabulous Miss Kathy King when I was at Penland last spring.  I can't believe it has been almost a year already since I was there!  But not to fear, I am going back in May and June for a month to do some more studio assisting and I can't wait.  I am going to get to wood fire!  I will be working with Richard Burkett and Joe Molinaro in the first two week session and then I will be assisting Marc Leuthold in a second two week session for beginning and intermediate wheel throwers.  Both of these classes can be found on the Penland website.  I encourage everyone to take a class a Penland.  It is a blast!  

But wait, that's not all.  I will also be assisting Jenny Mendes in her workshop, Surface Navigation, at Arrowmont School of Arts and Crafts in July.  It is going to be a very, very busy, busy year as I will also be traveling to Houston for the annual ceramics conference, NCECA, and I will be packing and moving across the country to go to grad school.  Wish me luck and lots of energy!


Monday, January 14, 2013

Soda Love


Remember a couple of posts ago when I was working on my paper stencil patterns at my computer table?  Well, here are the beauties!  Yes, it has taken me almost a month to get them photographed.  The firing was right before Christmas!  I think I have an aversion to my somewhat bulky photo shoot set up.   
Time to tackle that problem and make a mini version that doesn't take over my tiny living room.


But all that aside, I am really excited with the progress I am making with these.  It was a crazy long firing because the kiln door bricks and furniture got wet in a wild downpour so we had to "dry" out the kiln first.  It went for sixteen or eighteen hours or so when it should have only been about 12.  We did finally get the kiln firing much more evenly but I messed with the flew damper enough to knock a bunch of junk down into some of my pieces.  I've ground out a bunch of it and will try touching up the glaze and re-firing them in another cone 10 firing, or even cone 6 electric to see how that might work.


I'm busy making more work so that hopefully I can get another soda firing going by the first of February. Keeping my fingers crossed about that one.  I'm not exactly sure if I'll have access to the same kiln but if that doesn't work out I can always take some work out to Penland!  Yep, I'm headed out there again in May for a month to do some more studio assisting.  I can't wait!  And I am also going out to Arrowmont for my very first time!

Side A
Here is another one of my favorite pieces that I made last fall.  I stuck this in with my besties and started using it right away.  Somehow I just forgot that I wanted to document it.

Side B
I actually made two of these and the other one was fabulous also, that is until I sacrificed it to the soda kiln.  I was so positive it would come out great but I was not at all happy with it.  The underglaze fumed and bled and the clay body went very grey.  It's interesting and I'm sure someone would like it but me?  Not so much.  I'm glad I took this photo.  Something about seeing them in the right light on a nice backdrop has freshened my determination to make a few more.  


Tuesday, December 18, 2012

Drink This!


Life is moving on a pretty rapid clip as my semester as teaching assistant at Chico State is coming to a close.  I am so excited that I have been accepted to two great shows coming up very soon.  Here is the poster for the first show, Drink This! The Workhouse International Ceramic Cup Show, juried by Linda Arbuckle.  Linda is a wonderful ceramic artist who shares so much information with the ceramics community.  I am truly honored to have been accepted into this show.  Thanks Linda and Workhouse